The relocation process can get quite hard. You need to take care of so many things that it is easy to get lost in them all. Luckily, you can always ask for assistance from LV movers if you want an easier time of it. But when it comes the time to pack picture frames and mirrors for relocation many of us start scratching their heads. If you are one of these people, do not worry, it is actually not that hard. You will need some materials and a step-by-step guide and it will all be fine! While we can’t really provide you the materials in this article, a step-by-step guide will be covered, as well as some other useful tips.
Pack Picture Frames And Mirrors For Relocation – How To Do It Properly?
When moving items such as frames and mirrors, it is normal to be afraid of glass shattering or frames being in danger. This can all be prevented by following the steps in this guide. So:
First Things First – Gather All Necessary Supplies
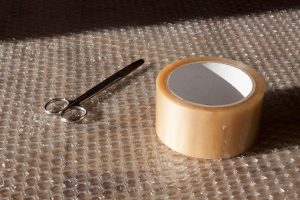
Before you can start packing, you will need packing supplies for your mirrors and frames. If you are unsure of what exactly will you need, you can always call any of the moving companies Henderson NV and ask for advice. However, you can be sure that you will need packing paper, packing tape, bubble packs, cardboard sheets, artist’s tape, permanent marker, special mirror/picture boxes, small moving boxes and similar. Again, you might not need all of these items and you might need more of them, it all depends on what exactly you are transporting. If you are in doubt, consult a professional, that is always the best idea.

Pack Picture Frames And Mirrors For Relocation – 7 Steps!
Here are the seven simple steps for packing your mirrors or frames. You already have the supplies in hand, now it is the time to:
- Use the artist’s tape to create an “X” of sorts across the glass, in order to keep it intact during transportation
- Place a piece of cardboard (that is slightly larger than the frame) over the glass and secure it in place with packing tape. Cut the cardboard into such a piece if needed.
- Liberally apply packing paper over the entire piece and tape any loose ends.
- You can use bubble packs for even more security and padding. Make sure to also secure them with the tape.
- Use packing paper as a cushion for the bottom of the mirror/picture box. Slide the piece into the box after that. You can place smaller frames and mirrors inside of the same box by stacking them vertically. Do not lay them flat.
- If there is any extra space, fill it with more packing paper to prevent any shifts.
- Pack Fragile items properly. Tape the box and label it as “fragile”. Remember to label each side.
Moving Canvases
There are two ways to move the canvas and they depend on the fact if the canvas is stretched or rolled. We will provide instructions for both.
Stretched
If your canvas is stretched, you first need to cover it with some archival paper or acid-free paper. Glassine works as well. Then you will need to tape a piece of cardboard to the back of the canvas. After that, the canvas needs to go into a plastic wrap bag. This will protect your canvas from any moisture during the transport. Then use the bubble pack, two layers if possible, wrap the entire canvas with it and use tape to secure it. However, before you start packing, don’t forget to make the ultimate list of moving supplies!
Once this has been completed, you want to take two large sheets of cardboard and place your canvas between them. Again, bind them with additional packing tape. Then you need to pad a mirror box with some paper before sliding the canvas in. Fill extra space with more packing paper, as necessary. Finally, you can tape everything and label the box.

Rolled
This one is easier to prepare for relocation. You simply need to lay the canvas between two sheets of paper and make sure that the painted side is facing down. After that, you roll the canvas and paper. Make sure to do it loosely as a tight roll can damage your canvas. Simply roll with bubble packs after that, slide it in a cardboard tube, place the cap and label it! Done and done.
Pack Picture Frames And Mirrors For Relocation – How To Store Loose Photos
If you have a lot of photos lying around your home and want to properly organize and store them, there are three methods that are universally accepted as “the best”. They are:
- Albums
- Photo Boxes
- Digital Storage
Albums are the most popular way of storing your pictures. However, you want to avoid those that are magnetic or not acid-free because your pictures can get damaged in the long run. You want to wrap these albums in several layers of packing paper before stacking them vertically.
Photo boxes are best for long-term storage of your pictures. Again, don’t use anything that is not acid-free or that is made out of metal. If your boxes have dividers, make sure to use them, they are really great for organization. If not, simply add some sheets of paper (acid-free) instead. However, if you have no space at home for all those items, you can also pack and store everything at the nearby storage facility.
Digital storage, admittedly, takes quite a bit of time. However, this will ensure that your photos and pictures last until you need them to. If you can’t devote the time or resources to digitally store every single photo, then make sure that your favorites are there, at least. You can do this by simply scanning the images to your computer and storing them on a medium of your choice. You can use clouds, USB’s, HDD’s, online storage websites, etc.

Bonus packing tips
And, here are some additional tips:
- Boxes should not go over 38 lbs.
- Never use newspaper for wrapping
- No packing peanuts
- Always wash your hands thoroughly before handling paintings or photos
- Never lay your boxes flat. Pressure can damage or even crack the glass.


